
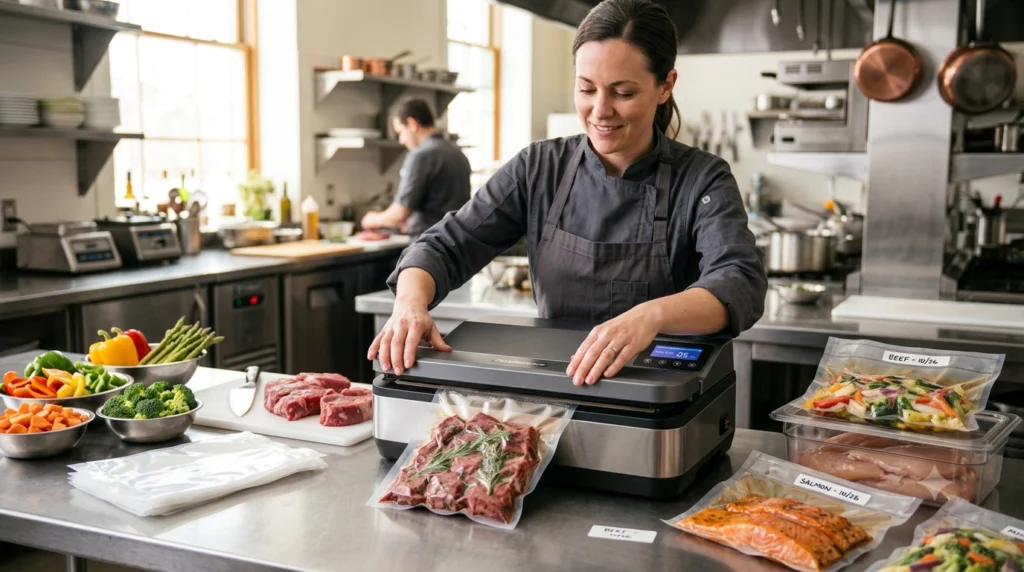
Use a vacuum sealer is very easy. If you’ve ever pulled a “vacuum sealed” bag of chicken out of the freezer only to find it puffed up with air and covered in frost, you already know the truth: owning a vacuum sealer and actually using one correctly are two different things. Most sealing failures come down to a handful of fixable habits — the wrong bag, a wet gasket, or rushing the seal cycle before the machine is ready.
This guide walks through the whole process, from your first bag to sous vide prep to troubleshooting a machine that suddenly won’t seal. No fluff, just what actually works at the counter.
What You Need Before You Start
Before you seal anything, it helps to know what kind of machine you’re working with and what bags it actually needs. Using the wrong bag material is one of the most common reasons seals fail on the very first try.
Countertop (external) vs. handheld vs. chamber sealers
Countertop (external) vacuum sealers are the most common type in home kitchens. You insert the open end of a bag into a channel, the machine pulls air out from the outside, then heat-seals the opening. These work with ribbed or textured bags only, because the vacuum pump needs channels along the bag to draw air out.
Handheld sealers are smaller, battery-powered devices that attach to zipper-style bags with a one-way valve. They’re convenient for quick jobs and marinating but pull a weaker vacuum than countertop machines, so they’re not ideal for long-term freezer storage.
Chamber vacuum sealers work differently: the entire bag goes inside a sealed chamber, and air is removed from the whole chamber at once, not just the bag. This lets you use smooth, non-textured bags (which are cheaper per bag) and makes it possible to seal liquids and marinades without spillage, since the pressure inside and outside the bag equalizes evenly. Chamber sealers cost more upfront but are the standard in commercial kitchens for a reason.
Choosing the right bags
Bag choice matters as much as the machine. Rules of thumb:
- External/countertop sealers need textured or embossed bags so air has a path to escape. Smooth bags will look sealed but often trap air pockets.
- Chamber sealers can use smooth bags since the vacuum happens outside the bag.
- Sous vide cooking calls for bags rated for prolonged submersion in hot water — check that the packaging specifically says sous vide or boil-safe.
- Reused bags should be inspected for pinholes, cloudiness, or a stretched seal edge before reuse; freezer-grade bags handle a few wash-and-reuse cycles better than thin bags.
Step-by-Step: Sealing Your First Bag

Filling and positioning the bag
Leave at least 3 inches of empty bag between the food and where the seal will be made. This gives the machine enough clean surface to grip and heat-seal properly. Wipe down the inside of that top section if any liquid, crumbs, or grease got on it — contamination on the seal line is the single biggest cause of weak seals.
Choosing moist vs. dry mode
Most countertop sealers have a moist/dry setting:
- Dry mode is for bread, dry goods, coffee, and anything without surface moisture. It uses a shorter, lower-heat seal cycle.
- Moist mode is for raw meat, marinated food, or anything with juice or condensation on the bag’s inner surface. It runs a longer, hotter seal to fully fuse the plastic through the moisture.
Using dry mode on wet food is a common reason seals look fine at first and then fail a day later.
Manual vacuum vs. automatic sealing
Automatic mode runs the full vacuum-and-seal cycle on its own and is the right choice for most everyday sealing. Manual mode lets you stop the vacuum at a specific point before sealing — useful for delicate foods you don’t want crushed, or for liquids where you need to catch the vacuum right before liquid gets pulled into the machine.
Sealing Tricky Foods Without Ruining the Seal
Liquids and marinades
Liquids are the classic vacuum sealer headache because the machine can pull them right up into the pump. Two reliable fixes:
- Freeze first. Pour the liquid or marinade into a shallow container or freeze it in the bag itself until solid, then seal as normal.
- Use the manual pause trick. On manual mode, watch the bag closely and hit seal the moment liquid approaches the top of the bag, before it reaches the machine’s channel.
Chamber sealers avoid this problem entirely since they don’t pull air through the bag opening.
Sharp or bony items
Bones, shellfish shells, and sharp cuts can puncture bags during or after sealing. Wrap sharp edges in a layer of paper towel or use a double layer of bag material at the point of contact. Freezer-weight bags resist punctures better than standard ones.
Soft or delicate foods
For berries, baked goods, or anything that can be crushed by the vacuum, use manual mode and stop the vacuum early, or freeze the item solid first (flash-freeze on a tray) before sealing so the shape holds under pressure.
Vacuum Sealing for Sous Vide
Why sous vide bags need a stronger seal
Sous vide bags sit in circulating hot water for hours, sometimes over 24 hours for tougher cuts. A seal that would hold fine in the freezer can slowly fail under sustained heat and water pressure, letting water seep in and ruining the dish. That’s why sous vide specifically calls for boil-safe bags and a full, even seal line with no wrinkles or food debris trapped in it.
The water displacement method
If you don’t have a vacuum sealer or want to seal a liquid-heavy sous vide bag, the water displacement method works well:
- Place food in a zipper-style bag and seal it almost all the way, leaving a small opening at one corner.
- Slowly lower the bag into a pot of water, keeping the opening above the surface.
- Water pressure pushes air out through the small gap as the bag submerges.
- Seal the last corner just as the bag is nearly fully submerged.
This is also the answer to “how do you vacuum seal without a machine” — it’s not a true vacuum, but it removes enough air for effective sous vide cooking.
Avoiding bag failure
- Double-check the seal line for wrinkles before cooking; a wrinkle is a common leak point.
- Leave extra bag material near the seal so it doesn’t sit directly against the pot or sous vide container wall.
- Avoid overfilling — food pressed right up against the seal increases the chance of it reopening under heat.
Fixing Common Sealing Problems
Machine won’t vacuum air out
This is usually a seal-path issue, not a broken pump. Check for:
- Wrinkles or folds in the bag where it sits in the vacuum channel
- Food, liquid, or crumbs on the bag near the opening
- A dirty or damaged gasket that’s breaking the airtight seal needed to pull vacuum
- A bag that’s not pushed in far enough to reach the channel
Vacuums but won’t seal
If air is being removed but the bag isn’t fusing shut, the sealing strip is the likely culprit:
- The heating element may need time to cool between uses — sealing back-to-back bags can overheat it temporarily
- Moisture on the seal area needs the moist setting, not dry
- A worn sealing strip may need replacing (see maintenance section below)
Bag re-inflates later
A bag that looks sealed but puffs up hours or days later almost always has a seal that wasn’t fully fused, often due to a wrinkle, debris, or the wrong moisture setting. It can also mean a tiny puncture from a bone or sharp edge. If food inside still looks and smells normal and it’s been in the fridge or freezer, it’s typically fine to re-seal and use — but if there’s any off smell, discoloration, or it’s been at room temperature, don’t take the risk.
Machine won’t power on
Before assuming it’s broken, check the basics: outlet works, cord is fully seated, and the lid or latch is properly closed — most machines have a safety switch that won’t allow power unless the lid is locked down.
.
Keeping Your Vacuum Sealer Working Longer
Cleaning the gasket and drip tray
The gasket (the rubber seal around the lid) is the most common point of failure over time. Wipe it down after every use with a damp cloth, and remove it periodically for a full wash if your model allows it — food residue here is a top cause of weak vacuums. Empty and rinse the drip tray regularly too, especially after sealing anything moist, since dried liquid buildup can affect suction.
Draining the pump
Some countertop models pull in small amounts of liquid despite your best efforts. If your machine has a removable drip tray or reservoir, check and empty it after any liquid-heavy sealing session. Letting liquid sit in the pump area can lead to mold or reduced suction over time.
When to replace parts
- Gaskets: replace if cracked, flattened, or no longer holding an airtight seal even when clean
- Sealing strips: replace if seals look uneven, don’t fully fuse, or the strip looks scorched
- Foam strips (some models): replace if torn or compressed, as they help direct airflow during the vacuum cycle
How Long Vacuum Sealed Food Actually Lasts
Vacuum sealing extends shelf life significantly compared to regular storage, but it isn’t indefinite — it slows spoilage by removing oxygen, not by eliminating bacteria that don’t need air to grow.
Freezer storage times
| Food | Regular Freezer | Vacuum Sealed |
|---|---|---|
| Beef, pork, lamb | 6–12 months | 2–3 years |
| Poultry | 6–9 months | 2–3 years |
| Fish | 3–6 months | 1–2 years |
| Vegetables | 8–12 months | 2–3 years |
| Bread | 2–3 months | 6–12 months |
Fridge storage times
| Food | Regular Fridge | Vacuum Sealed |
| Raw meat/poultry | 1–3 days | 1–2 weeks |
| Cooked leftovers | 3–5 days | 1–2 weeks |
| Hard cheese | 3–4 weeks | 4–8 months |
| Fresh vegetables | 3–7 days | 2–3 weeks |
Quick Overview
| Step | What Happens |
|---|---|
| 1. Prepare food | Dry, cool, and portion food before sealing |
| 2. Load the bag | Insert the open end into the sealer’s vacuum chamber |
| 3. Close the lid | Latch the sealer so the chamber is airtight |
| 4. Run the cycle | Machine removes air, then heat-seals the bag |
| 5. Check the seal | Confirm a tight, even seal line with no gaps |
What You’ll Need
- A vacuum sealer (external or chamber style)
- Vacuum sealer bags or rolls compatible with your machine
- The food or item you’re sealing, prepped and portioned
- A clean, dry work surface
Bags matter as much as the machine. Regular storage bags, even ones labeled “freezer bags,” generally aren’t designed to hold a vacuum seal and can let air back in.
Common Mistakes That Weaken a Seal
| Mistake | Why It Matters |
|---|---|
| Overfilling the bag | Leaves no room for the seal strip to close properly |
| Wet or greasy bag opening | Prevents the heat seal from bonding fully |
| Wrinkled bag at the seal line | Creates small gaps air can pass through |
| Using non-compatible bags | Some bags aren’t textured or thick enough to hold vacuum |
| Sealing food that’s too hot | Can trigger moisture sensors or affect the bag’s integrity |
If a vacuum sealer isn’t pulling air at all, this is usually a separate issue related to the machine itself. See our troubleshooting guide on why a vacuum sealer might not be vacuuming.
Sealing Different Types of Items
Not everything seals the same way:
- Liquids and soups — freeze in a container first, then seal the solid block, or use a lower vacuum setting to avoid pulling liquid into the machine
- Mason jars — require a jar sealer attachment rather than a standard bag
- Delicate foods (bread, chips) — use a manual or gentle seal setting to avoid crushing
- Marinated foods — seal in a bag with the marinade, keeping liquid below the fill line
Each of these has its own detailed process; see the related guides below for specifics.
Best Foods for Beginners to Vacuum Seal
Some foods are more forgiving than others for a first attempt. Starting with simple, dry, or firm items makes it easier to get a feel for the machine before moving on to trickier foods like liquids or delicate baked goods.
Good starting points include:
- Boneless meat portions — chicken breasts or ground beef divided into meal-sized portions freeze well and rarely puncture the bag
- Dry pantry staples — rice, pasta, oats, and flour seal easily and show an obvious, satisfying result
- Cheese blocks — hard or semi-hard cheese (like cheddar) seals cleanly and extends fridge life noticeably
- Coffee beans or ground coffee — a common beginner project, since it protects flavor and is easy to portion
- Nuts and dried fruit — low moisture content means minimal risk of the machine’s moisture sensor interrupting the cycle
These items share two traits that make them beginner-friendly: they don’t produce excess liquid during sealing, and they hold their shape, so there’s little risk of crushing or bag punctures.
Once comfortable with the basic process, foods that require extra steps, such as liquids, soft cheeses, or items with bones, are easier to approach with confidence.
Dry goods and pantry storage
Dry goods like rice, flour, coffee, and dehydrated foods can last 1–2 years longer when vacuum sealed compared to a standard sealed container, largely by keeping out moisture and oxygen. For long-term pantry storage, pairing vacuum sealing with an oxygen absorber further extends shelf life for staples like rice and beans.
Regardless of vacuum sealing, food safety basics still apply: refrigerate or freeze promptly, don’t seal food that’s already spoiled, and use your senses — if something smells or looks off, the vacuum seal doesn’t change that.
When Not to Vacuum Seal Food
Vacuum sealing is not appropriate for every food, and in a few cases, it can create a food safety risk rather than reduce one.
The core issue is that removing oxygen does not stop all bacteria; it favors anaerobic bacteria, which grow without oxygen. One example the USDA and FDA specifically caution about is Clostridium botulinum, the bacterium responsible for botulism, which can grow in low-oxygen, low-acid environments if food is not kept at a safe refrigeration or freezing temperature.
For this reason, the following should generally not be vacuum sealed and stored at room temperature:
- Fresh mushrooms — can continue to harbor bacteria in a low-oxygen environment if not refrigerated
- Garlic or herbs in oil — a well-documented botulism risk unless acidified, refrigerated, and used quickly, per FDA guidance
- Fresh, unblanched vegetables destined for long-term storage — enzymes remain active without oxygen exposure, which can affect texture, color, and safety over time
- Ripening fruit — bananas, avocados, and similar fruits continue to release ethylene gas as they ripen, which can cause bags to inflate or seals to fail
None of these foods are unsafe to vacuum seal outright. The key requirement is that they must go directly into the refrigerator or freezer immediately after sealing, not be left at room temperature, since vacuum sealing changes the storage environment but does not replace the need for cold temperatures.
How to Store Vacuum Sealed Food After Sealing
Sealing the bag is only the first half of proper storage. Where and how the sealed package is kept afterward has a direct effect on how well it holds up.
- Refrigerate or freeze immediately for perishable food. Vacuum sealing slows spoilage; it does not pause it at room temperature.
- Label and date each bag before storing. Vacuum sealed food can look similar once frozen, and labels prevent guesswork later.
- Lay bags flat in the freezer, especially for meat and liquids, so they freeze evenly and stack more easily once solid.
- Keep bags away from sharp edges, such as bone fragments or hard-shelled foods, which can puncture the seal during storage.
- Practice first-in, first-out rotation by placing newly sealed bags behind older ones, so nothing gets pushed to the back and forgotten.
- Store dry pantry goods in a cool, dark place, since heat and light can degrade quality even in a vacuum sealed package.
A vacuum seal significantly extends how long food stays in good condition, but it works together with proper temperature and organization, not as a replacement for either.
Final Thoughts
Vacuum sealing is one of the easiest ways to keep food fresh longer — but only if you use the right technique and the right machine.
If you’re just starting out, choosing a beginner-friendly vacuum sealer can make the whole process much easier and prevent common sealing mistakes.
👉 Check out our guide to the **best vacuum sealers for beginners** to find a reliable option that fits your budget and needs.
Quick Answers
Can you reuse vacuum seal bags?
Yes, as long as they haven’t held raw meat, fish, or poultry, and show no punctures, cracks, or cloudiness. Wash and fully dry before reuse.
Why is my vacuum sealer not sealing all the way?
Usually wrinkles, moisture, or debris on the seal line, or the wrong moist/dry setting for the food.
Do you need special bags for a vacuum sealer?
External sealers need textured/embossed bags; chamber sealers can use smooth bags. Sous vide needs bags rated for hot water.
Can you vacuum seal liquids?
Yes — freeze the liquid first, use manual mode to stop before liquid reaches the machine, or use a chamber sealer.
How do you vacuum seal without a machine?
The water displacement method using a zipper bag and a pot of water removes most of the air without any machine.
Is vacuum sealed food still good if the bag has air in it later?
If it’s still cold and smells normal, it’s usually fine to re-seal and use soon. Discard if there’s any off odor or it’s been left unrefrigerated.
What’s the difference between a vacuum sealer and a chamber sealer?
A standard vacuum sealer pulls air from inside the bag through a channel; a chamber sealer removes air from an entire sealed chamber, allowing smooth bags and safe sealing of liquids.
Can you vacuum seal meat for sous vide the same way as for freezing?
Mostly yes, but use boil-safe bags and double-check for wrinkle-free, fully fused seals since sous vide seals face more stress from heat and water over time.
Food Safety References
The guidance in this article is based on recommendations from:
Always follow your specific vacuum sealer’s manufacturer instructions, since features and settings vary by model.

FreshSealLab publishes research-based guides on vacuum sealing, food storage,
and sous vide, referencing USDA and FDA food safety guidance. Content is
reviewed for accuracy and updated as guidance changes.