
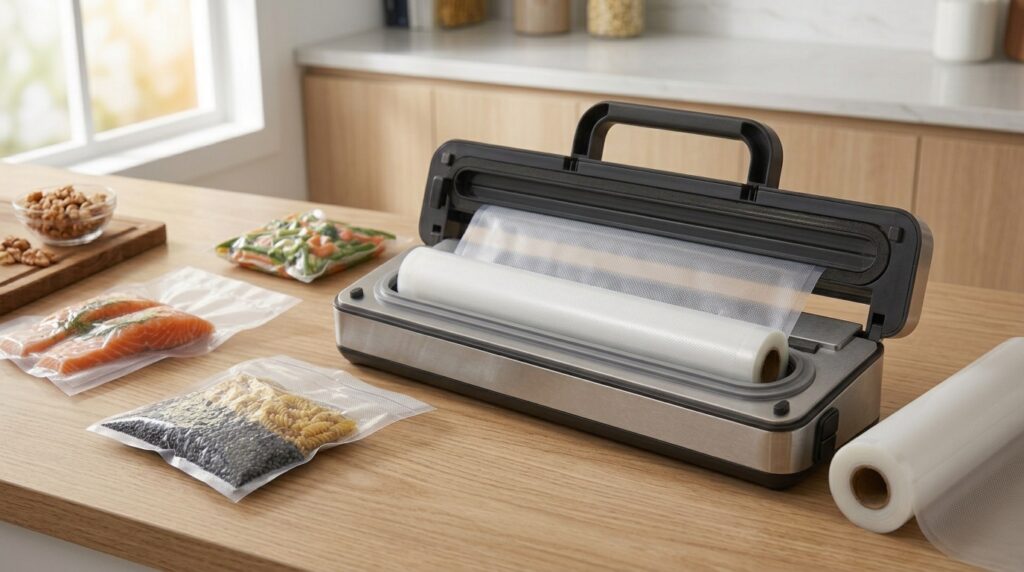
Quick Answer
Yes, you can vacuum seal liquids. The catch is that most external vacuum sealers can draw liquid toward the bag opening and seal area as they remove air. This can ruin the seal and, if liquid reaches the pump or internal components, may damage the machine. The right method depends on the sealer you own. Three practical options are to freeze the liquid first, use a jar or canister attachment, or use a chamber vacuum sealer designed for liquid sealing.
Why Liquids Are Hard to Vacuum Seal
Most home vacuum sealers are built for solid or semi-solid food. They work by pulling air out of a bag through a narrow channel, then pressing the bag edges together to form a seal.
Liquid doesn’t stay put during that process. As the machine suctions air out, it pulls the liquid along with it. That liquid can reach the seal bar before the bag closes, which leaves you with a weak seal or a bag that won’t close at all. In worse cases, it gets drawn past the bag opening and into the machine itself, where it can damage internal components.
This is primarily a mechanical problem, not an indication that the liquid itself is unsafe. The challenge is keeping liquid away from the seal area and the vacuum system while the machine removes air.
Choose Your Method by Equipment
The method that works best for you depends on what sealer you already own. Here’s a quick way to sort it out:
You have an edge-style (external) vacuum sealer, like most FoodSaver models → use the freeze-first method for free liquids.
You have a compatible jar sealer or canister attachment use the jar or canister method.
You have a chamber vacuum sealer designed for liquid sealing; use the direct-seal method.
Some external vacuum sealers have pulse, manual, or moist-food settings that provide more control with damp foods. However, a moist or manual setting does not automatically mean the machine is designed to vacuum-seal free liquids directly. Check your specific model’s instructions before trying it.
If you’re not sure which category your machine falls into, the freeze-first method is generally the simplest and most reliable starting point.
Method 1: Freeze-First (Works With Most Standard Sealers)
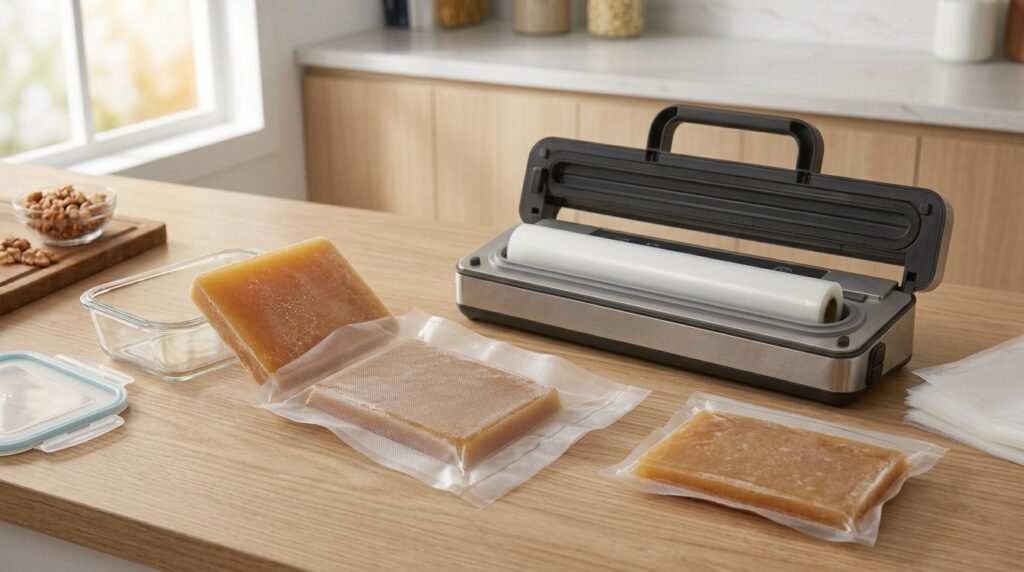
This is the most common method because it doesn’t require special attachments. You freeze the liquid into a solid shape first, then vacuum seal it like you would a piece of meat or a block of cheese.
Steps:
- Pour the liquid into a freezer-safe container, silicone mold, or a zip-top bag laid flat on a baking sheet.
- Freeze until completely solid. This usually takes several hours, depending on the container and liquid volume.
- Remove the frozen liquid from its container or bag.
- Place the frozen block into your vacuum seal bag.
- Seal as you normally would for solid food.
- Label the bag with the contents and date before storing it in the freezer.
Flat-pack tip: Freeze liquids in a thin, flat layer rather than a tall container. Flat blocks vacuum seal more evenly, stack better in the freezer, and thaw faster when you’re ready to use them.
Method 2: Jar or Canister Attachment
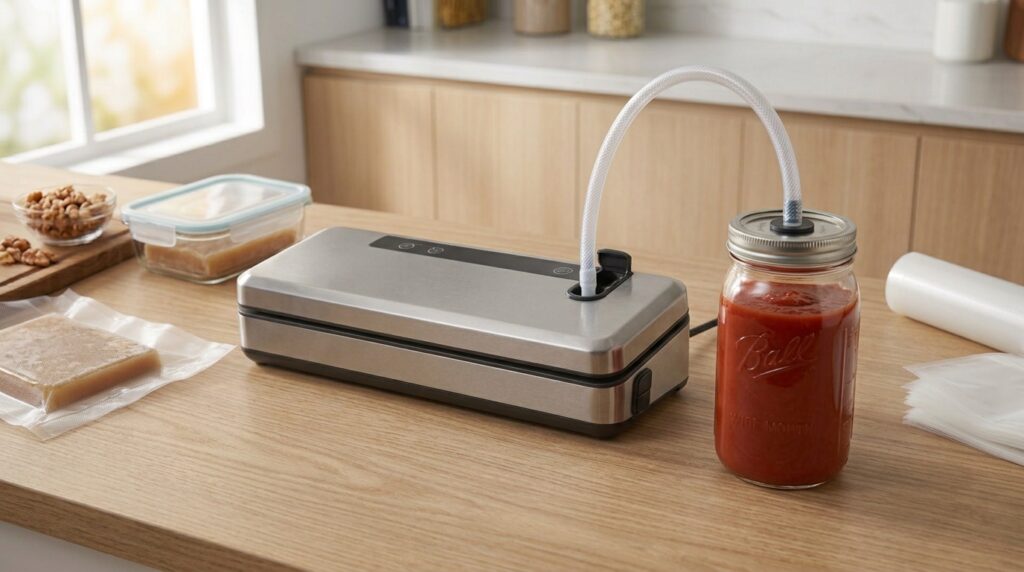
If your vacuum sealer came with (or supports) a jar sealer or canister accessory, you can seal liquids the same day without freezing anything first.
Steps:
- Pour the liquid into a compatible jar or canister, leaving headspace at the top (check your accessory’s instructions for the recommended gap).
- Attach the jar sealer or canister lid according to your machine’s instructions.
- Run the vacuum cycle. The attachment pulls air from the sealed jar or canister rather than through an open bag, so liquid isn’t drawn toward the machine.
- Once the cycle finishes, check that the lid has a firm seal before storing.
This method works well for thicker liquids like sauces and gravies, and it’s the fastest option if you already own the accessory. The tradeoff is that jar and canister sizes limit how much you can seal in one batch.
Method 3: Direct Seal With a Chamber Vacuum Sealer
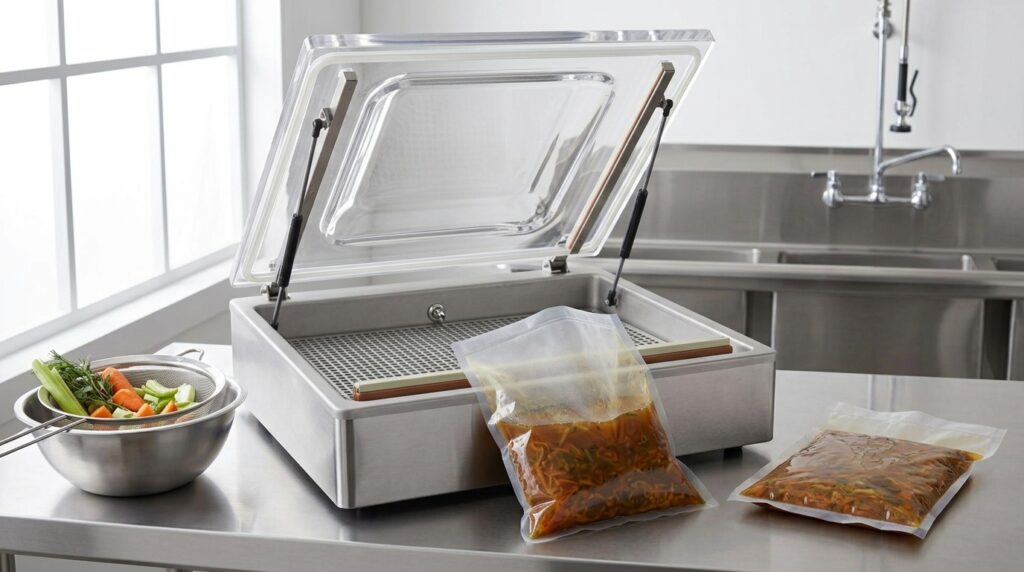
A chamber vacuum sealer designed for liquid sealing can handle liquids directly without freezing them first. Unlike an external edge sealer, a chamber machine changes the pressure around the entire bag inside the chamber, which reduces the tendency for liquid to rush toward the seal area.
Steps:
1. Pour the liquid into a compatible vacuum bag, leaving enough headspace for the liquid to move during the cycle.
2. Place the open end of the bag correctly inside the chamber according to the machine’s instructions.
3. Select the appropriate liquid or vacuum setting if your machine provides one.
4. Start the vacuum cycle and monitor the liquid as the pressure changes.
5. Let the machine complete the vacuum and sealing cycle according to its programmed settings.
6. Remove the sealed bag and check the seal for a clean, continuous bond.
**Important:** Do not assume that every chamber vacuum sealer is suitable for every type or volume of liquid. Follow the manufacturer’s instructions for liquid products, bag placement, fill level, and cycle settings.
**What about external sealers with pulse or manual controls?** Some models provide better control when sealing moist foods, but those features do not necessarily make the machine suitable for free liquids. If the manufacturer does not specifically support direct liquid sealing, use the freeze-first or compatible jar/canister method instead.
How to Vacuum Seal Liquids Without Freezing
If freezing isn’t an option, you have two practical choices depending on your equipment.
If your vacuum sealer supports a compatible jar or canister attachment, use that method. It is generally more forgiving because the liquid stays inside a rigid container while air is removed.
If you own a chamber vacuum sealer designed for liquid sealing, you can seal compatible liquids directly in vacuum bags without freezing first. Follow the manufacturer’s recommended fill levels and cycle settings.
External edge-style sealers with pulse or manual controls may offer more control with moist foods, but those settings should not be treated as proof that the machine can safely handle free liquids. Check the specific model’s manual before attempting direct liquid sealing.
Not every liquid behaves the same way in a vacuum sealer. Thin liquids move faster and are harder to control than thick ones.
| Liquid Type | Examples | Best Method(s) | Why |
|---|---|---|---|
| Thin | Broth, stock, wine, watery soup | Freeze-first (safest); jar/canister if same-day needed | Thin liquids climb bag walls quickly during suction, making direct sealing riskier |
| Medium | Sauce, gravy, thick soup | Jar/canister or freeze-first | Moves slower than thin liquids but can still spill into the seal area without care |
| Thick | Stew, chili, purée | Direct seal, jar/canister, or freeze-first | Thick consistency resists suction pull, giving more control during direct sealing |
If you’re new to sealing liquids, start with a thicker liquid before trying broth or wine with the direct-seal method. Thin liquids leave the least margin for error.
- Method Comparison Table (Freeze-First vs. Jar/Canister vs. Direct Seal) — included above in “Choose Your Method” section context, shown in full detail form below for CMS use:
| Method | Best For | Pros | Cons | Why Choose It |
|---|---|---|---|---|
| Freeze-first | Any sealer type, thin or thick liquids | No special equipment; works with basic edge sealers | Requires freezer space and lead time; can’t seal same-day | Lowest barrier to entry, most reliable seal |
| Jar/canister accessory | FoodSaver-type owners with the accessory, thick liquids (sauces) | No freezing needed; reusable jars | Requires buying the accessory; jar sizes limit batch size | Fastest same-day option for owners who already have the attachment |
| Direct seal with pulse/manual mode | Chamber vacuum owners, or edge sealers with a manual/moist setting | No freezing, no extra accessory | Requires practice timing the pulse; higher risk of liquid loss for beginners | Best for frequent liquid-sealers who want speed |
Quality vs. Safety: What Vacuum Sealing Does and Doesn’t Do
It’s easy to assume that a tight vacuum seal means the food inside is automatically safe. That’s not accurate.
Vacuum sealing can help preserve food quality by reducing exposure to air. This may help slow oxidation, protect flavor and texture, and reduce freezer burn during frozen storage. What it does not do is make perishable food shelf-stable. Removing air does not stop harmful microorganisms that can grow under low-oxygen conditions, including the bacteria that causes botulism.
The USDA and FDA are clear on this point: vacuum-sealed food still needs to be refrigerated or frozen. This matters especially for liquids sealed using the jar/canister or direct-seal methods, since it can feel like the sealing process alone is what’s keeping the food safe. Treat vacuum sealing as a quality tool, not a substitute for proper temperature control.
A few practical guardrails:
- Let hot liquids cool to room temperature before sealing and refrigerating or freezing. Sealing something straight off the stove traps heat inside the bag, which can affect the seal and slow safe cooling.
- Never store vacuum-sealed liquids at room temperature, even briefly, beyond normal food-safety handling windows.
- When in doubt about a specific liquid’s safe storage time, check USDA or FDA guidance rather than relying on general assumptions.
Troubleshooting
Turn off and unplug the sealer before cleaning it. Check your owner’s manual for cleaning instructions specific to your model. Many edge sealers have a removable drip tray or channel designed to catch small amounts of liquid. If liquid has entered areas that the manual does not describe as user-serviceable, contact the manufacturer rather than opening the machine yourself.
Seal won’t hold with liquid inside.
This usually means liquid reached the seal bar before it closed. Wipe the bag opening dry, trim off the affected section if there’s enough bag length left, and reseal. Going forward, leave more headspace or switch to the freeze-first method for that liquid.
Bag reopened after freezing.
Check for wrinkles or debris along the seal line before freezing next time — both are common causes of seal failure. If a bag reopens in the freezer, transfer the contents to a new bag and reseal rather than assuming the food is still protected from freezer burn.
Storing, Thawing, and Reheating Vacuum-Sealed Liquids
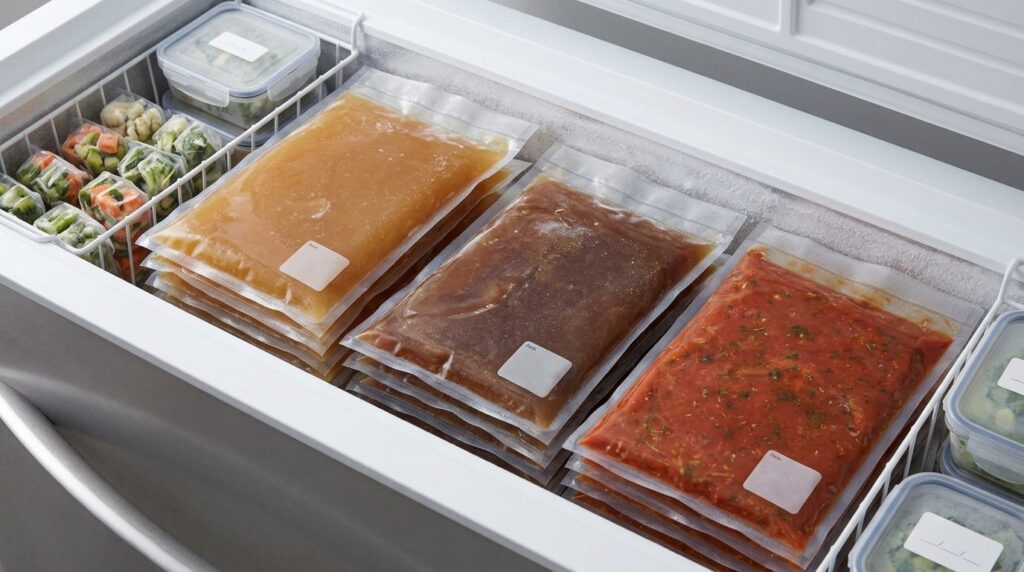
Once your liquid is sealed, orientation matters. Flat-packed bags stack more efficiently in the freezer and thaw faster than bags frozen in a lump shape.
For thawing, move the bag to the refrigerator ahead of time rather than leaving it at room temperature. For reheating, follow standard food-safety practices for the type of liquid you’re working with — bring soups and broths to a full simmer, and check sauces for even heating throughout.
Exact shelf-life windows depend on the liquid type, how it was stored, and your freezer’s temperature consistency. For detailed shelf-life guidance, see our full guide: How Long Does Vacuum Sealed Food Last?
FAQ
Can you vacuum seal hot liquids straight off the stove, or do they need to cool first?
Let liquids cool to room temperature before sealing. Sealing hot liquid traps heat in the bag, which can warp the bag material and slow the cooling process once it’s in the freezer or fridge.
Does freezing liquid before sealing change its texture once reheated?
Some liquids, especially those with dairy or a lot of starch, can separate slightly after freezing and thawing. A quick whisk or stir while reheating usually brings the texture back.
Is there a difference between a “moist” or “wet” setting and the normal mode on a vacuum sealer?
Yes. A moist or wet setting typically runs a slower, more controlled vacuum cycle, which gives you more time to react if liquid starts moving toward the seal bar. Check your specific model’s manual, since settings vary by brand.
Can you vacuum seal wine, broth, or other alcohol- or high-water-content liquids the same way?
Yes, but treat them as thin liquids. The freeze-first method is the most reliable option for wine, broth, and similar high-water-content liquids.
Do liquids need headspace before freezing in a vacuum bag?
Yes. Liquids expand as they freeze, so leaving headspace in the container or bag helps prevent it from bursting or straining the seal.
Is it safe to vacuum seal liquids for room-temperature storage?
No. Vacuum sealing does not make liquids shelf-stable. Refrigerate or freeze vacuum-sealed liquids according to USDA and FDA guidance for that specific food.
Key Takeaways
- Liquids can be vacuum sealed — the method just depends on your equipment.
- Freeze-first works with almost any sealer and is the most beginner-friendly option.
- Jar and canister attachments allow same-day sealing without freezing.
- Direct sealing with a pulse or manual mode is fastest once you learn the timing, but it takes practice.
- Vacuum sealing preserves quality — it does not make liquids safe to store at room temperature.
